

(Psst: The FTC wants me to remind you that this website contains affiliate links. That means if you make a purchase from a link you click on, I might receive a small commission. This does not increase the price you’ll pay for that item nor does it decrease the awesomeness of the item. ~ Daisy)
By the Author of The Prepper’s Canning Guide and The Ultimate Guide to Frugal Living
[Originally published at TheOrganicPrepper.com] A few words about pressure canning.
First of all…
You are NOT going to blow up your house when you are pressure canning.
Let’s put this thought to rest right now! My first attempt at pressure canning took place after I’d sent the girls off to school one day, just in case, things began exploding. I had anxious visions of geysers of boiling water, a hole in the ceiling where the lid of the canner had flown off, and third degree burns. Seriously: I was a nervous wreck!
It was sort of a non-event, to be quite honest. There are some loud noises to get used to, it’s a bit alarming to put a stopper on the steam coming out of the little vent on top, and you have to patiently wait for the pressure to reduce at the end.
There are only a few ways that you are likely to hurt yourself or blow up your kitchen (and even then, it’s really really unlikely, particularly with the new canners and all their requisite safety measures).
- You use equipment that is old and faulty.
- You can something when the vent is blocked (peek through and check it each time – takes 2 seconds!)
- You allow the pressure to exceed 17 PSI and you leave it like that for an extended period of time.
- You try to remove the lid before the pressure has dispersed.
If you don’t do any of those things, you will be perfectly safe – I promise! Always read your manufacturer’s instructions, and if those instructions differ from mine, FOLLOW THEIRS!!! They are the experts on their own equipment.
Once you trump your anxiety over pressure canning (if this applies to you) then you will take your prepping to a completely different level – you can preserve your healthy, carefully sourced meats and even entire meals in shiny glass jars that line your pantry shelves.
*****
Low-acid foods have to be preserved at a higher temperature than high-acid foods. The low-acid environment welcomes the growth of bacteria like botulism, a form of food poisoning that can cause permanent nerve damage or even death.
Pressure canning exceeds the temperature of water bath canning, getting your product into the safety zone. The temperature must reach 240 degrees Fahrenheit, which can only be achieved through steam under pressure. All vegetables (except for tomatoes which are botanically a fruit), meats, seafood and poultry, must be preserved in a pressure canner.
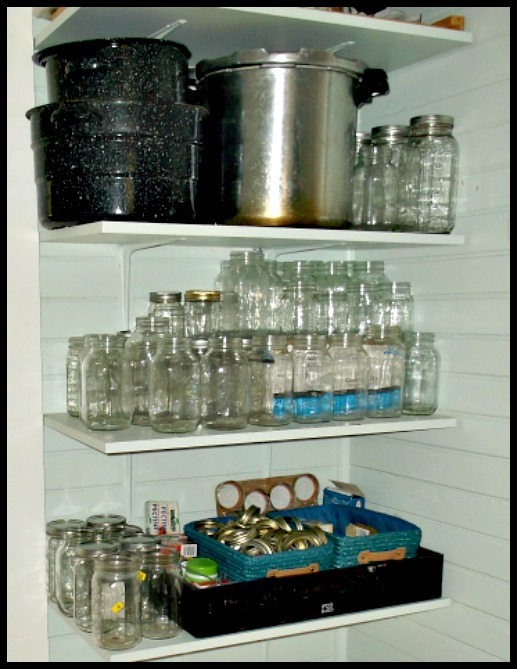
This is what you need for pressure canning:
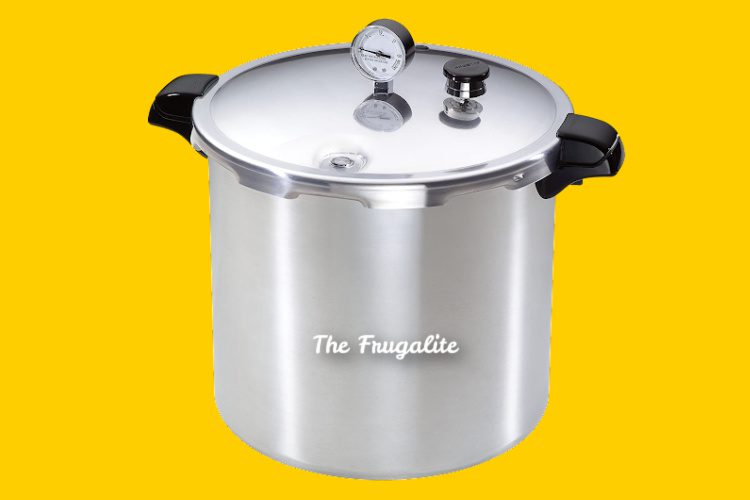
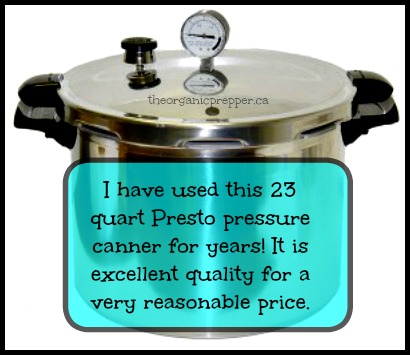
Pressure canner with valves, seals and gauges
I have THIS ONE
(If you have a glass cooktop THIS PRESSURE CANNER is approved for use on it)
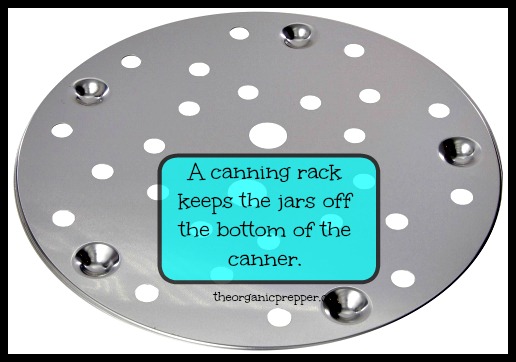
Rack
If you don’t have a rack you can use a folded towel in the bottom of the pot or get a replacement HERE
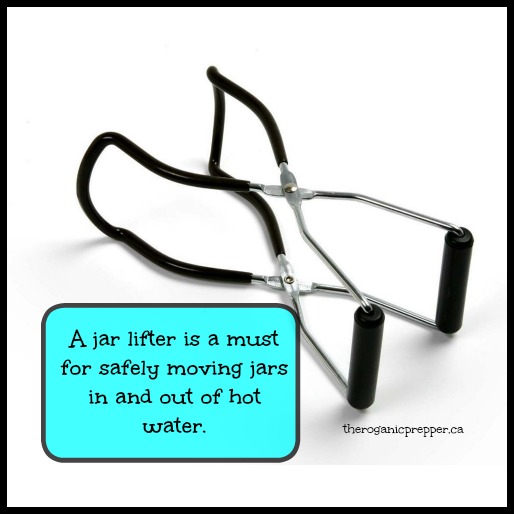
Jar lifter
This is an absolute must have to avoid burns – you can find one HERE at a very reasonable price.
I like to keep a spare on hand, just in case.
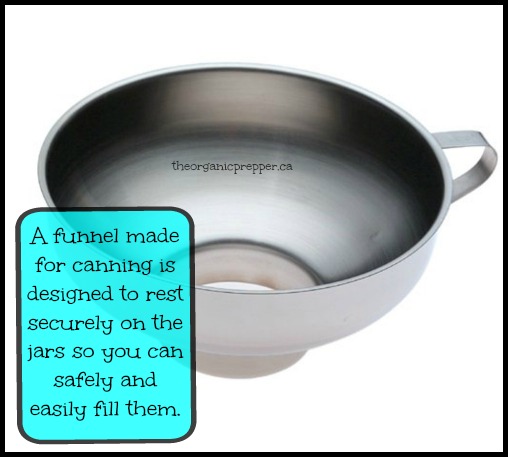
Canning jar funnel
These are designed to rest inside your jars so that you can safely ladle boiling hot contents into them without burning yourself or making a huge mess.
I like this stainless steel type that doesn’t absorb odors or leach petrocarbons into your food. You can find it HERE.
As with water bath canning, you can get all the gadgets if you want too, but these are the essentials.
Then of course you also need:
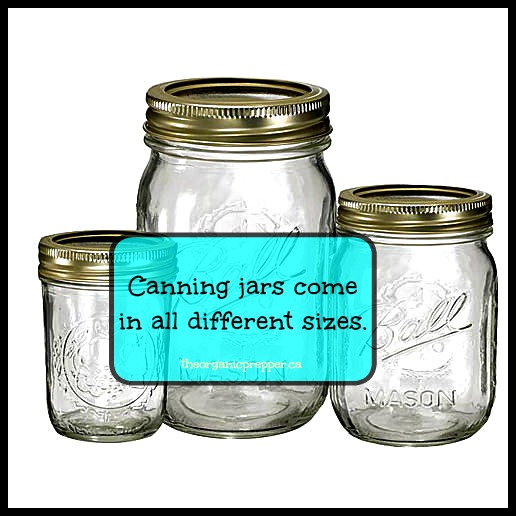
Jars
I keep all different sizes on hand for different types of canning projects.
You can find some pretty good deals HERE and they change seasonally.
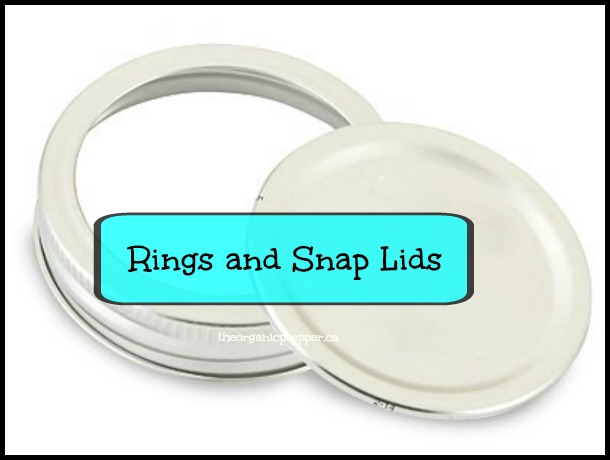
Flats (also called snap lids) and Rings
I strongly recommend THIS KIND because they are BPA-free.
THESE LIDS are also BPA-free. They’re far more expensive initially, but they’re reusable, so in the long run they are a better deal.
Easy Step-by-Step Guide to Pressure Canning
One thing you will notice about pressure canning is that nearly all of the steps are identical to the method for water bath canning. Differences (in italics) are really only related to the equipment. So, once you have learned to use your pressure canner correctly, you will find it every bit as easy as water bath canning.
Sanitize your jars, lids and rings. If you have a dishwasher, you can wash them in the dishwasher – the heat from it is enough to sterilize everything. Otherwise, you need to boil them for at least 10 minutes, lifting them carefully in and out with the jar lifter. Leave the items in the dishwasher or the hot water until ready to use.
Prepare your canner. Place your rack or folded towel in the bottom of your canner add about 3 inches of water to the canner. Most p-canners have a line to which you fill the water. In pressure canning it is not necessary for the water to cover the lids. (Always check the instructions on your individual canner – it there is a discrepancy, go with the instructions that came with your product.) At this point, you can turn the burner on low to begin warming the water, but don’t bring it to a boil yet.
Fill your jars. Line up your jars on the counter near the stove. If the surface is not heat proof, place a towel on the counter first because the filled jars will be very hot. Using the funnel, ladle the prepared product into the jars, leaving the headspace recommended in your recipe.
Put on your lids. With a dry clean dishtowel, carefully wipe the lip of the filled jars, making sure to get any residue of food off. You can dampen the dishtowel with vinegar to remove anything sticky or greasy. Place the flats on each jar, then finger tighten the rings – you don’t have to really torque on them.
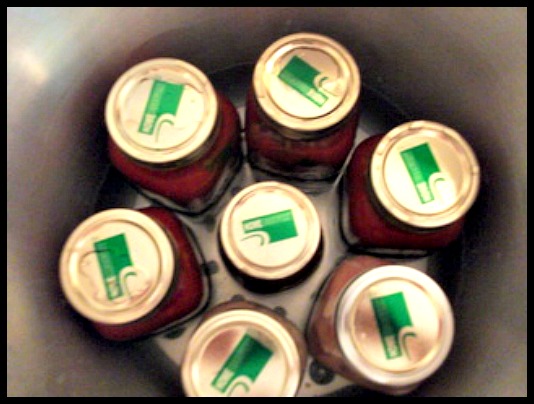
Place your jars in the canner. Place the closed jars into the canner. Be careful not to let the jars touch because not only could they break when they bump together in the boiling water, but in p-canning the steam must be able to completely circulate around the jars.
Build steam in the canner. Before putting the lid on the canner, check the vent pipe every single time to be sure it is clear. Place the lid firmly on the canner, latching it as per the specifics of your canner, and increase the heat to bring the water to a boil. At this point steam should be coming out the vent pipe. Reduce the heat until a moderate amount of steam is coming steadily out the pipe for 10 minutes. The purpose of this is to release the air and build up the steam inside the canner. If you don’t give it the whole 10 minutes, your canner will not build pressure. As patience is not my strong point, I learned this from experience.
Close the vent. After exhausting the steam for 10 minutes, depending on your canner, either close the petcock or place the weighted regulator on the vent pipe. When I place the regulator on, I always put a dishtowel around my hand, cause, yeah, steam is HOT. It sometimes makes a loud high-pitched noise when you are putting the regulator on – I scared myself the first time and screamed, causing my child to think I’d gone and blown myself up. (tee-hee) Don’t be alarmed by the various rattling, whistling and bubbling noises. P-canning is loud business.
Pressurize the canner. Turn up the heat on the burner and wait until the gauge has reached the desired pressure. (Pressure will differ based on altitudes and recipes). This usually takes 3-5 minutes. Note: if you lose pressure during processing you must re-start the processing time. Adjust the heat to maintain the pressure – this takes practice. Monitor your canner throughout the processing time to be sure the pressure is maintained. I have found that approximately #4 on the dial on my electric stove keeps my pressure between 10-12 pounds quite steadily.
Release the pressure. When your processing time is over it is time to release the pressure. It couldn’t be easier. Turn off the burner. Take the canner off the burner and put it on a heat-proof surface. Walk away. Allow the canner to return to room temperature and release pressure naturally. Don’t try to do anything to cool it down faster – that is how people get hurt p-canning. Pressure is completely reduced when the air vent/cover lock and overpressure plug have dropped and no steam escapes when the pressure regulator is tilted. The gauge, if your canner has one, should be completely at zero. This can take 45 minutes to an hour and cannot be rushed!
Open the vent. When pressure is gone, open the petcock or remove the weighted regulator. If the regulator doesn’t want to come off – there is likely still some pressure in the canner. Don’t force it – walk away for another 15 minutes. Once the vent is open, leave the canner for another 2-5 minutes.
Remove the jars from the canner. Use potholders to protect your hands while you unlatch the lid of your p-canner. Very carefully remove the lid to the canner, facing it away from you so that you are not burned by the steam that will rush out. Using your jar lifter, carefully remove the jars from the canner, one by one. Then place the jar on your towel or heat-proof surface.
Allow 12-24 hours for the jars to cool and seal. Let the jars stand in a draft-free place without being moved or bumped, usually overnight. Jars that are sealed properly will bubble away on the counter for quite some time after they are removed from the p-canner. You will hear a musical “pop” as the jars seal in the cool air – that is the lid getting sucked down and forming a seal on the jar. When you are ready to store the jars, you can remove the rings and then test the seal by pushing down with your finger. If it pops back and forth it is not sealed. Put it in the refrigerator and use the unsealed product right away. Store your sealed jars in a cool, dark place.
Easy-peasy, right?
Do you pressure can? Do you have some tips for the newbies? If you’re a newbie, do you have any questions? Let’s talk about pressure canning in the comments.
Resources for Canning:
Presto 01781 23-Quart Pressure Canner and Cooker
Presto 1755 16-Quart Aluminum Pressure Cooker/Canner (Safe for glass cooktops)
Presto Cooking/Canning Rack for Pressure Canner
How to Can Food in a Boiling Water Bath
Granite Ware 0707-1 Steel/Porcelain Water-Bath Canner with Rack, 21.5-Quart, Black
Norpro Stainless Steel Wide-Mouth Funnel
How to Sanitize Jars for Canning
How to Adjust for Altitude When Canning
Ball Regular Mouth Lids and Bands – 12 pack
Ball Wide Canning Lids 72 Lids (6 Dozen)
About Daisy
Daisy Luther is a coffee-swigging, adventure-seeking, globe-trotting blogger. She is the founder and publisher of three websites. 1) The Organic Prepper, which is about current events, preparedness, self-reliance, and the pursuit of liberty; 2) The Frugalite, a website with thrifty tips and solutions to help people get a handle on their personal finances without feeling deprived; and 3) PreppersDailyNews.com, an aggregate site where you can find links to all the most important news for those who wish to be prepared. Her work is widely republished across alternative media and she has appeared in many interviews.
Daisy is the best-selling author of 5 traditionally published books, 12 self-published books, and runs a small digital publishing company with PDF guides, printables, and courses at SelfRelianceand Survival.com You can find her on Facebook, Pinterest, Gab, MeWe, Parler, Instagram, and Twitter.


6 thoughts on “How to Pressure Can Food (You Will Not Blow Up Your House!)”
Great article! I, too, was terrified I would blow up my house with a pressure canner, but it really isn’t too scary in practice. I have the Presto 16 Quart, and I love it! However, I wish I had purchased the larger 23 quart.
I would also tell people not to be intimidated by how long it takes to fully process a batch of food – most of the time is hands-off, and you can work on getting additional food prepped or just clean your kitchen.
Very good information! The first time I used my All-American pressure canner, I hid around the corner of the doorway thinking things were going to explode! Once you get past the first few times and follow directions, it is a piece of cake!
I’ve been canning my food for about 20 years. It became a necessity living off the grid when I found my refrigeration was taking way too much energy. Living alone, I use 8oz jars. Most people only think of canning vegetables. But I can almost everything. Preparing a meal is trivial. Take 3 jars of vegetables; one jar of meat; heat up in saucepan of hot water; and bammo…I have a meal in about 10 minutes. They say not to reuse the lids. I reuse the lids many times. I use a twisting motion when fitting them to the jar. If they resist the twisting and bind, I try to use them one more time. I seldom have 10% or more fail to seal. And it’s no big deal. They just become my next meal. I find with time, the jars fatigue and start to break. But they’re made with glass that doesn’t shatter. One thing I’ve learned not to can. That is frozen vegetables. They just turn to mush. And I never put anything in with what I can (except maybe a little bit of water with fresh corn that is sometimes too dry).
Looks like a link is missing . . .
“I strongly recommend THIS KIND because they are BPA-free.
“THESE LIDS are also BPA-free. They’re far more expensive initially, but they’re reusable, so in the long run they are a better deal.”
Above is a quote from the article itself. The first link [THIS KIND] takes you to a Ball Sure-Tight ad. The second intended link [THESE LIDS] is not a link and goes nowhere. ????????
History of pressure cookers:
https://www.oldandinteresting.com/pressure-cooker-history.aspx
Newer articles on how to avoid pressure cooker problems:
https://www.gainsberglaw.com/blog/exploding-pressure-cookers-and-what-you-need-to-know/
https://www.searcylaw.com/pressure-cooker-injuries-long-history/
After World War II there was a huge consumer demand for pressure cookers. Some manufacturers cut corners with some bad metallurgy and when some of those cookers blew up, it gave the industry a bad name for a long time. [The exploding pressure cooker that left beans on my grandmother’s kitchen ceiling left an unforgettable story in our family history.] While most cookers of that era are probably too old today to even find replacement sealing rings for them, the two law firm articles above make it clear that checking the news and recent online research about exploding pressure cooker brands could help someone avoid the bad ones ,,, and avoid other blunders that have nothing to do with pressure cooker quality.
–Lewis
Both my grandmothers and my mother were all enthusiastic canners. I inherited some of their pressure cookers even though those are probably too old by now to find replacement seals for them. But I think they could be reworked into being useful Faraday cages.
A more recent surprise to me was the body of knowledge about dehydrating foods. Tammy Gangloff’s website at https://www.dehydrate2store.com/ is a good place to learn about that technology. While dehydrators, vacuum sealers, and oxygen absorbers, etc require some different learning and some cash, there were two notable observations that Ms. Gangloff made that I found worth remembering. 1. Most (but not all) foods respond well to being dehydrated — so it’s worthwhile to learn what the exceptions are. 2. While canning preserves about 50% or so of the foods’ original nutrition, dehydration is exceptional in that it preserves more like 90% of that nutrition.
All I’m saying is that for some people and for some foods, dehydration is a worthwhile preservation alternative.
–Lewis