

(Psst: The FTC wants me to remind you that this website contains affiliate links. That means if you make a purchase from a link you click on, I might receive a small commission. This does not increase the price you’ll pay for that item nor does it decrease the awesomeness of the item. ~ Daisy)
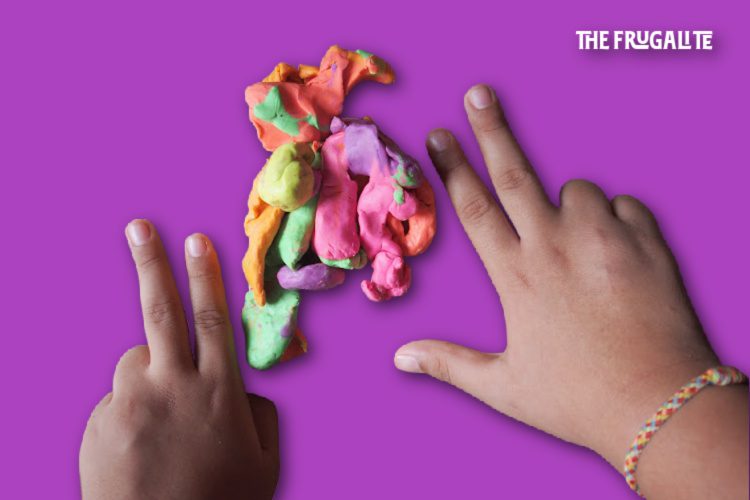
If you had to ask me what one of my favorite childhood memories would be, going to my grandmother’s house and making play-dough would have to be at the top of my list. Almost every time my sister and I would go over for a sleepover, we’d get out some big plastic bags, all the ingredients for playdough, and any color of food coloring we wanted. Then, we got to let our creative freedoms loose for at least a solid hour. It was a great way to occupy us, and it’s a great way to entertain kids today too.
This is What You Get When You Buy Store-Bought Play-Doh
While store-bought play-dough is easy (after all, you just buy it and can play with it right away), it can rack up your expenses, especially when you have to pay such high prices for such small amounts.
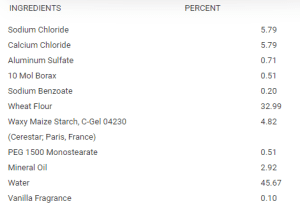
The other downside of the store-bought stuff is the ingredients. To the left is a list of ingredients that are typically found within the brand name Play-Doh, as listed by their official Patent. I don’t know about you, but, knowing how likely kids are to put things like toys, or pretend food in their mouth (a.k.a. Play-Doh), I don’t want my children accidentally consuming borax or any other chemical not made for consumption.
The Benefits of Making Play-Dough from Scratch
While I still wouldn’t recommend eating homemade play dough, considering each ingredient is something that you could find in any number of baked goods, it’s a lot less likely to send you to the doctor in case of accidental consumption. You know exactly what’s going into it.
Another benefit is that you get to enjoy making it with your kids as part of the activity, and afterward, if there is something they really like, you can bake it in the oven, and you’ll have a solid piece of sculpted beauty at the end. (This can totally make for a great present!) Not to mention that, with the aid of food coloring, you can make it absolutely any color you’d like.
Here’s What You’ll Need
As I said, the ingredients are pretty straightforward and easy. Here’s what you need:
- 1 cup all-purpose flour
- 1/4 cup salt (the finer the grind, the better)
- 1 tsp. cream of tartar
- 1/2 tbsp. oil (I recommend going with something cheap like vegetable or canola oil, but any oil you have on hand will do)
- 1/2 cup boiling water
- food coloring of your choice
In a large mixing bowl, mix all your dry ingredients together. Make a little well in the center, and add your boiling water, oil, and food coloring. Once it’s cooled down enough and the ingredients are fully mixed, you get to have at her and let your creative fun run wild!
To store your play-dough for another day, just put it in an airtight, sealed container, like a plastic bag or Tupperware container.
Note: if your kids want to help with the mixing, you can totally have them do it themselves, just within a large sealed ziplock bag. This is also a great way to incorporate the food coloring.
A Little Extra Sparkle
If you want to add a little extra sparkle and fun to your play-dough, you can either add the regular store-bought assorted glitter, or you can try a little baking glitter. Something to note is that baking glitter might make it a bit more expensive to make. Whatever you choose, this will give your creations a pretty shimmer and shine that any kid would love!
A Play-Dough Keepsake
If your kiddo has made something spectacular that they want to keep or that they want to give to a loved one, that’s not a problem. When you bake your play-dough, it will actually harden it (much like baking pottery in a kiln).
Heat your oven to 250°F, and bake your playdough within. Depending how thick the piece is will determine how long it needs to bake. I recommend starting out with about 30 minutes but be aware it can take up to 2-3 hours. Just keep an eye on it and check on it every 20-30 minutes. When the play-dough becomes solid and hard, it’s ready to pull out. Let it cool, and then you’re good to go!
P.S. I totally recommend putting a piece of parchment paper down on the cookie sheet before you put the playdough on to bake.
Things To Do with Your Play-Dough
While there is the obvious choice of letting your kid’s imagination run wild with their new toy, play-dough can be so much more than that. Not only can it be a fun activity, but it can also be utilized to make presents for others, as well as help develop fine motor skills, and be used as a teaching tool. If you’re homeschooling, I’d definitely recommend utilizing all the cool things you can do with the colorful dough.
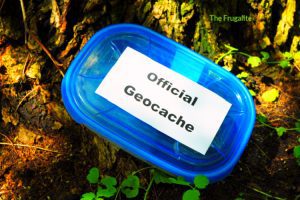
- Hide a couple of small toys or things like beads within the playdough, give your kiddo a couple of little tools, and let them go digging and extracting the mystery surprises within, just as if digging for treasure or dinosaur bones.
- Make presents for any occasion, from birthdays to Christmas, to anything in between.
- Let them dig through the kitchen and find things to use with the playdough. See what patterns and textures different things make.
- Get to sculpting! Kids can make any number of shapes, objects, animals, or even people. (P.S. This is a great activity for developing fine motor skills.)
- Learning shapes, letters, and numbers. You and the kiddos can make a game out of it! Make all sorts of shapes, numbers, and letters, and practice identifying what they are. Use a tactic often used in speech therapy, and mimic the figures they are creating. Ask questions that get them curious, experimenting, and seeing what happens when they take different actions.
- Learn their colors. Start with your basic primary colors of red, blue, and yellow, and let them see what happens when they mix what colors.
- Practice things like counting, sorting, and making patterns, with the different colors of playdough.
- Play-dough can be used as a prop for storytelling. Kids can create characters, scenes, and props with play-doh while narrating or retelling of their favorite stories.
- Try experimenting with play-dough, kids can have a whole host of fun when they make some easy science experiments, like sinking and floating objects. They can mold different shapes and test their buoyancy in water. To make the most out of this one, ask them what they think will happen before they try!
 The fun is endless
Needless to say, there are so many things that can be done with play dough, everything from playing to learning. The most important thing though, is the fun that can be had, no matter where on the scale you fall. The entertainment can easily last for hours.
So, what are your favorite activities to use play-dough for? Have you ever made it from scratch before? Do you have any play-dough DIY recipes? Would you try making anything with play-dough?
Let’s talk about it in the comments section!
About Chloe Morgan
Chloe Morgan grew up living with a tight budget. In her late teens and early 20’s, all the lessons she’d learned started to slip, like it does for many college-age students on their own for the first time with their first credit card. As she’s gotten older, she’s started to deal with the repercussions and has taken on a frugal way of living, keeping her costs low, as she pays off debt and saves for her future. Chloe lives on Vancouver Island, Canada, with her dog, Rhea.
Check out her Simple Debt & Budget Trackers, and her other work on TheOrganicPrepper.com and TheFrugalite.com where she writes about food, frugality, finances, and self-reliance, or her work on Medium, where she writes about lifestyle, mental health, and writing.


1 thought on “How to Make Play-Dough and 9 Fun Things to Do with It”
I suspect the ingredient list of today is not the list of the 1960s (or 1970s). I’d let the kids make edible play-dough once they were old enough to know to *not* consume the purchased play-dough. And yes, lots of fun I remember having and I think my kids even more. I have no idea what it was called but you put in the “dough”, slid a strip with different shapes in, and pushed down the handle. You could use the long strip or cut it. Also had small rolling pins and “dough cutters” of various shapes.
Of course mixing colors together was also fun but I suspect it comes in more than 4 standard colors these days (purchased kind that is). Make your own opens all kinds of colors to be made.