


(Psst: The FTC wants me to remind you that this website contains affiliate links. That means if you make a purchase from a link you click on, I might receive a small commission. This does not increase the price you’ll pay for that item nor does it decrease the awesomeness of the item. ~ Daisy)
by the author of
The Ultimate Guide to Frugal Living and The Flat Broke Cookbook
ATTENTION: We Regret to Announce That Due to Rising Costs, Pizza Night Has Been Cancelled Until Further Notice.
Wait! Drop that megaphone! If you make your own homemade pizza, pizza night could be every night of the week with these thrifty recipes. There are multiple ways to make your own pizza, from sort of scratch to full-on scratch. All of them are less expensive than having pizza delivered, and heck, even less than frozen pizza. The last time I looked, frozen pizza could not be found for less than ten bucks. Ouch.
Plus, the stuff you make is SO. MUCH. BETTER. And you can control what goes on it. And you can make sure your kids get a veggie or two. Plus, it can be really fun to assemble the pizzas together on movie night.

The Crust of Your Homemade Pizza
The best supporting actor in the cast of pizza is, of course, the crust. There are all sorts of bases for a pizza, but here are some of the ones we find to be the tastiest and thriftiest. These doughs work for all of the recipes except the deep dish one, in which the crust is the star of the show.
Don’t be overwhelmed by making scratch pizza dough. Most of the time to make it is hands-off.
From Scratch
Here’s my favorite simple pizza dough recipe.
Ingredients
- 3 to 3.5 cups of flour
- 1 cup of warm water
- 1 tbsp of sugar
- 2 1/4 tsp of active dry yeast
- 3 tbsp of olive oil
- 1 tsp salt
Directions
- Stir water, sugar, and yeast together and allow it to sit for 5 minutes.
- Add olive oil and salt, then stir in the flour until well blended.
- Knead the dough for about 5 minutes, then let it rise, covered, for 30 minutes.
- Preheat the oven to 425F.
- Knead the dough again, then roll it out.
- Top it with your desired toppings.
- Bake for 15-20 minutes, or until lightly golden brown.
If you get your yeast in bulk is way more thrifty than in those little packets.
Sort of Scratch
Next, we have “sort of scratch.” These doughs take a wee bit of work but not quite as much as making it from scratch. But keep in mind, we pay for the time of others. These shortcuts add money to the price of your pizza.
- Refrigerated dough (none of the mixing, only some rising and rolling)
- Crescent roll dough pizza (get off-brand)
- Bisquik pizza (here’s a recipe for a homemade Bisquik-ish mix you can keep on hand at a fraction of the price)
Convenient
If you’re in a hurry, there are ways to get around making your own dough.
- Pizza crusts (the ones in the bread aisle are less expensive than the ones in the freezer aisle)
- Pitas (the nice thick ones)
- Tortillas (for thin crust personal pizzas – this was a family favorite for my kiddos, and it’s very inexpensive)
Now that you’ve got your base all set, it’s time to top some pizzas!
Classic Homemade Pizza
Pizza is a classic for a reason. Ordinary, everyday pizza is a hit for just about everyone.
Sauce:
- Canned spaghetti sauce
- Jarred spaghetti sauce
- Small can of pizza sauce
- Crushed tomatoes seasoned with basil, garlic powder, onion powder, oregano, and thyme
- Homemade marinara sauce
Toppings:
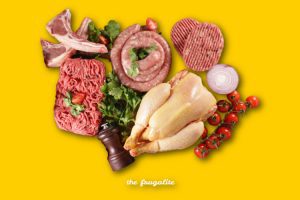
We all have our favorite pizza toppings, so use those here. I like to keep pepperoni, a bag of sauteed peppers and onions, and diced ham in the freezer to top an emergency pizza fast. But think about your family’s last pizza order – keep that stuff on hand for the most authentic take-out-fake-out possible.
Cheese:
Use your favorite cheese to top your pizza. We like a blend of mozzarella and parmesan. If you shred it yourself, you save much0-moolah over the bags of pre-shredded cheese.
Mexican Pizza
This was a household staple when my kiddos were growing up. It’s filling, frugal, and delicious.
Ingredients:
- Refried beans (canned or homemade)
- Salsa (from the store or homemade)
- Ground beef (or ground whatever-floats-your-boat)
- Taco seasoning (DIY version here)
- Diced veggies: tomato, peppers, onions
- Cheese (cheddar is a great option)
Instructions
- Cook your ground beef in a skillet with taco seasoning. About 1/4 pound of beef is plenty for one pizza, but add more if you want it meatier.
- Spread refried beans on the pizza crust of your choice.
- Spoon some salsa on top of it.
- Top it with cheese, then veggies.
- Sprinkle a tiny bit more taco seasoning on top.
- Bake it according to the needs of your crust or until everything is melty and hot.
Allow it to cool for 10 minutes before slicing. You may want to serve this with sour cream or more salsa for dipping.
White Pizza
The trick to white pizza is to pre-bake your dough before adding your toppings.
Toppings:
- Olive oil seasoned with either fresh garlic or garlic powder.
- Ricotta cheese (or whip up cottage cheese in the food processor for a cheaper version)
- Mozzarella (the tastiest is the balls of fresh mozzarella, thinly sliced; the easiest is pre-shredded mozzarella; the cheapest is to shred your own mozzarella from a brick of cheese)
- Parmesan
- Dried herbs: Italian seasoning, OR oregano, basil, parsley
Directions:
- Brush the crust with seasoned olive oil.
- Spread ricotta or whipped cottage cheese over it.
- Top it with mozzarella and parmesan.
- Sprinkle herbs on top.
- Bake it at 425 for 10-15 minutes until gloriously gooey and melty.
You can also add very finely chopped spinach and grilled chicken to this pizza to make it a bit more filling.
No-Cheese Pizza
No cheese? Is she CRAZY?
Well, yes, but not because of no-cheese pizza. In this pizza, the toppings are the stars of the show. In Italy, one version of this is called Pizza Marinara. I only make this with homemade pizza dough because I want everything present to be top quality.
- Pizza dough (homemade or store-bought dough)
- Marinara sauce (go with a really good one – I prefer homemade for this)
Topping Options
- Fresh herbs (head out to your garden and get some oregano and basil)
- Meat (I like to make this with ground beef, sausage crumbles, pepperoni, and ham)
- Veggie (peppers, onions, mushrooms, tomatoes, herbs)
The key is LOTS of toppings. You won’t miss the cheese if you use good ingredients.
Here are some more cheeseless pizza recipe ideas.
Breakfast Pizza
Pizza for breakfast? Yes PLEASE.
I like to use a base that is more common to breakfast food, like the DIY Bisquik recipe above or crescent roll dough. (Get the off-brand.) You can also use English muffins and make personal pizzas.
I use the same kind of sauce I’d use for classic pizza when I make breakfast pizza, but some folks like it better “white pizza” style with just the addition of breakfast-y things.
Toppings:
- Scrambled eggs
- Whole eggs cracked on top, salted, and peppered
- Crumbled bacon
- Sausage
- Diced ham
- Onions
- Peppers
- Mushrooms
- Shredded cheese
Directions
- Preheat your oven to 400 degrees (or whatever your dough requires.) Pre-bake your dough if it isn’t already cooked.
- Add your toppings. If money is tight, you can use far less meat. Try chopping it up smaller to make it go further and lend its flavor.
- If you’re using raw eggs, make sure to cook them to your desired consistency. As a hater of runny eggs (don’t hate me), I’d be devasted if I cut into my pizza and yellow goo ran all over it. But you might like that, so watch the eggs closely.
- Bake this for approximately 10-12 minutes until your eggs are done and your cheese melts everything together into deliciousness.
Barbeque Chicken Pizza
This is so incredibly delicious and tastes positively gourmet. We always save our leftover chicken for this tasty purpose.
Toppings
- Barbecue sauce of choice
- Cooked chicken off the bone
- Onions
- Hot Peppers
- Cheese
Directions
- Use the barbecue sauce like you would marinara and spread it all over your pizza crust. (Maybe a little more thinly spread if you like lots of sauce.)
- Top it with chicken, diced onions and hot peppers, and cheese.
- Bake it according to the needs of your crust.
Deep Dish Pizza
The star of deep dish pizza is, of course, the crust. That makes it filling and delicious. You can go all out and use this recipe for the dough, or you can take a shortcut and make your crust out of refrigerated biscuits – it depends on how much time you have.
I prefer to use my cast-iron skillet for deep-dish pizza. I always cook whatever meat I’m adding to the pizza in it to get a flavorful coating. Preheat your oven to 375.
You’re going to FILL your pizza instead of topping your pizza.
I cook all my fillings and then mix in the sauce. Here are the things I use for deep dish pizza:
- Sausage crumbles
- Ground beef
- Pepperoni (diced)
- Onions
- Mushrooms
Feel free to add all your favorites. Once the meat is cooked through, add the veggies and get them browned as well. Remove the toppings and put them into a large bowl. There, stir in your sauce.
Press the dough (whether biscuits or homemade) into your skillet once it’s cooled enough to touch, and make it go all the way up the sides. Then brush the dough with butter seasoned with garlic powder.
Add half of your cheese of choice to the pizza dough in the skillet.
Pour in your fillings, and then top it with the rest of the cheese.
I like to put my skillet on a cookie sheet in case my pie runneth over. Bake it for 20-25 minutes. Check it halfway through – you may need to lay some foil over it to prevent the edges from getting overcooked.
Let your deep dish pizza sit for 10-15 minutes before slicing. This is an eat-with-a-knife-and-fork pizza, and it’s super filling. One cast-iron skillet of pizza with a side of salad feeds all four of us, with nobody leaving hungry. This is so good that I often use it as a company meal.
What’s your favorite kind of homemade pizza?
How do you make homemade pizza? Do you have any thrifty pizza suggestions? Let’s talk about pizza in the comments.

About Daisy
Daisy Luther is a coffee-swigging, adventure-seeking, globe-trotting blogger. She is the founder and publisher of three websites. 1) The Organic Prepper, which is about current events, preparedness, self-reliance, and the pursuit of liberty; 2) The Frugalite, a website with thrifty tips and solutions to help people get a handle on their personal finances without feeling deprived; and 3) PreppersDailyNews.com, an aggregate site where you can find links to all the most important news for those who wish to be prepared. Her work is widely republished across alternative media and she has appeared in many interviews.
Daisy is the best-selling author of 5 traditionally published books, 12 self-published books, and runs a small digital publishing company with PDF guides, printables, and courses at SelfRelianceand Survival.com You can find her on Facebook, Pinterest, Gab, MeWe, Parler, Instagram, and Twitter.


8 thoughts on “7 Ways to Eat Thrifty Homemade Pizza Every Single Day”
I make pizza three different ways: using a pizza stone in the oven, using the crock pot and using a cast-iron skillet in the oven. Pizza stone for thin crust, crock pot for deep dish and cast-iron skillet for in between.
The crockpot pizza sounds really good. Can you please give instructions? Thankyou.
I’ve always thought barbecue chicken pizza is revolting, but that’s solely my opinion. Ditto with any fish or sea life.
I ran a few pizzerias while in college, back in the 80s. I still toss a few pies for the kids every month or so.
Some advice: make sure you put things on your pizza that go together. For example, never put broccoli on a red pizza (makes it incredibly bitter), only a white pizza. Don’t just dump the contents of your fridge onto a waiting crust. If it wouldn’t taste great together, tossed in a pot on the stove, it won’t taste great on a pizza.
Also, do not overdo the toppings unless your crust can handle it. If you make a thin crust pizza, especially one that is 16″ or larger, and put a lot of half a dozen toppings on your pie, then everything will fall off when you pick up the slice… even if you fold the slice like a New Yorker.
Your breakfast pizza recipe is a good one. Just remember, no red sauce.
One night when we were short of mozzarella, I mixed some shredded block cheddar with the remains of my mozzarella, along with ground beef, onions, and mushrooms. I turned it into a cheeseburger pizza and even my little ones (who hate onions) loved it.
I used to make pizza, all the time when the kid was younger. I’d double the dough and keep some in the freezer along w/the ingredients bought on sale. The kid would have friends over for pizza and movies. Cheap fun.
I will partially bake the crust on one side. Then on the cooked side I rub it with freshly crushed garlic and olive oil. Now put your toppings on the cooked side and finish the baking.
Some toppings I’d add if I was willing to spend a bit extra:
Artichoke Hearts (jarred – probably the priciest of my ideas, but worth trying)
Asparagus tips
Fresh tomato slices (Roma pear-shaped Italian tomatoes rock my world)
Red onion for those who like some zing
Thin slices of zucchini and / or yellow squash
Thin slices of eggplant
Slices of sweet and / or hot peppers (Hungarian hot wax peppers worked well for me, just remove the seeds).
Something totally off-the-wall – dollops of refried beans
I make gluten free pizza every week for Friday Night Pizza Night 🙂 This is a blend of Bobby Flay’s Pizza dough recipe and some advice gleaned from reading the copycat Against the Grain recipe from Gluten Free on a Shoestring’s blog. I didn’t have all the ingredients for GFOAS copycat recipe, and Against the Grain is my favorite GF pizza – just too expensive.
Your recipe, as printed in the article, with a couple of changes:
1) Substitute King Arthur Gluten Free Measure for Measure Flour (I like King Arthur because it has the
most neutral taste and a good texture)
2) Dough is not kneaded; use dough hooks on your hand or stand mixer to blend the dough
3) Add 5 ounces finely shredded Italian blend cheese (this helps hold the dough together)
4) The crusts are pressed out, not rolled. I find it helpful to use the inner edge of the pizza pan as a guide
to score the parchment paper, in effect tracing the circle with the edge of a spoon. Then I can work
with the paper on the counter, have a circle outline to aim for, and slide the parchment with the dough
onto the pan for baking.
5) It’s not hard, and the dough is very forgiving of being pressed back together if you get it a little uneven.
It doesn’t have to be perfect to be good 🙂
Ingredients
3.5 cups of King Arthur Gluten Free flour (or your favorite GF Flour)
1 cup of warm water
1 tbsp of sugar
2 1/4 tsp of active dry yeast
3 tbsp of olive oil
1 tsp salt
5 ounces finely shredded Italian Blend cheese
Directions (makes 2 pizzas)
Stir water, sugar, and yeast together and allow it to sit for 5 minutes.
Add olive oil and salt to the flour, then add liquid ingredients and blend together using dough hooks until
well blended.
Add the cheese, use dough hooks to incorporate into the dough
Set aside to rise, covered, for 30 minutes.
Preheat the oven to 425F
Line pizza pans with parchment paper, then drizzle some olive oil on the parchment
Divide the dough into 2 equal parts, form a ball with each
Place one ball in the center of your parchment lined pizza pan, gently press out into a circle.( It will be like pressing out playdough, the olive oil on the paper allows the dough to slide over its surface as you press out your circle, work the dough from the center outwards and rotate as needed to form your circle)
Repeat with the second ball of dough on the second parchment-lined pan
Pre-bake the crust for about 10-12 minutes (I judge by the underside of the edge – it should just be crisping up on the underside, the top will be very lightly golden)
Top it with your desired toppings.
Bake for another 15-20 minutes, or until your cheese is melted and as bubbly as you like!
I love making pizza! I make mine with bread style flour, high quality salt, yeast and water. And I take cheap tomato sauce and add tasty herbs to make my own cheap pizza sauce. Then turkey pepperoni and reduced fat cheese has allowed me to eat pizza once a week while losing over 90 pounds over the course of the last couple of years. Love it!
Some shredded brick cheese adds flavor also. We’ve been using a new refrigerated dough called Jus-Rol (USA made). Runs about $3.50 a roll in my area, comes rolled on parchment type paper which you bake it on. Haven’t tried any of the other products the company makes:
https://jusrol.com/