

(Psst: The FTC wants me to remind you that this website contains affiliate links. That means if you make a purchase from a link you click on, I might receive a small commission. This does not increase the price you’ll pay for that item nor does it decrease the awesomeness of the item. ~ Daisy)
by Rohvannyn Shaw
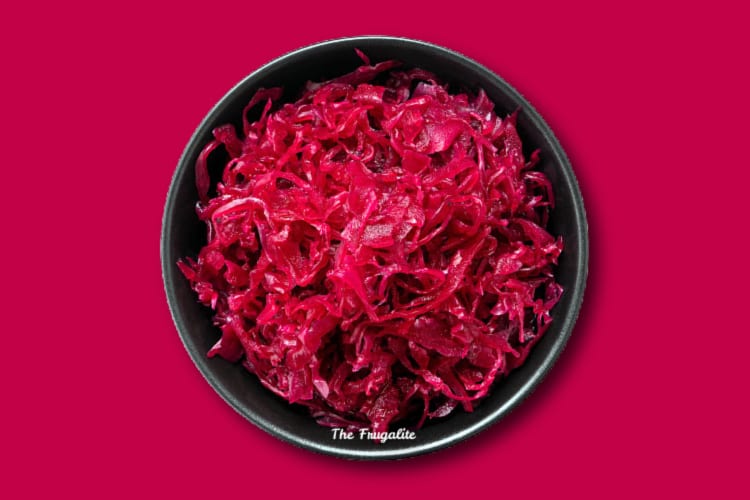
Sauerkraut is a tasty, tangy, probiotic-rich flavor booster and side dish. We’ve talked about using cabbage as a fresh vegetable, but now let’s talk about another means to use it.
Once a way to preserve bountiful cabbage harvests through the winter, it’s great with hot dogs, on sandwiches, with sausages, as a side dish, or even on its own. It’s also very cheap and easy to make!
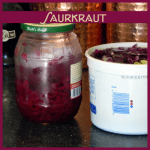
I like making small batches of sauerkraut because usually there’s only one thing to buy, one head of cabbage. Salt and water are usually already available, and it’s easy to find some kind of quart jar or food safe plastic container. I’ve successfully used large yogurt/cottage cheese containers for the fermentation as well as recycled pickle or olive jars. All you need is something with relatively straight sides and a wide mouth. You don’t even need a matching lid. There’s another secret about making small batches, too. They take much less time to ferment than the big ones! So you could have a finished product in 3-7 days instead of a few weeks. Making sauerkraut a quart at a time is also great because you can test different flavors and styles in a short period of time.
Enough about why sauerkraut is great, let’s make it!
The ingredients are simple and so is the process.
You’ll need:
- 1 cabbage of any color
- Water (preferably without chlorine)
- 2 TB salt (kosher or sea salt is best but any kind can be used)
- 1 sharp knife
- Large bowl
- 1 jar or other straight sided vessel
- Some kind of weight (a clean river stone, a lid with a jar of water on it, a clean bag with marbles, etc.)
- Optional: a potato masher
Directions
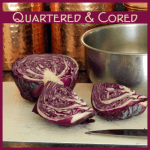
- Wash your cabbage and trim any bad spots or wilted leaves. If you have a big loose garden cabbage, cut it in quarters, core it, and let the water run between the leaves to wash out the dirt. Store cabbages are tighter and don’t need quite as much washing.
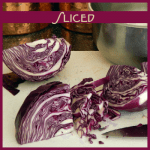
- Cut the cabbage. Do this by cutting it in quarters and coring it, then slicing into ribbons. (1) See picture for better explanation.
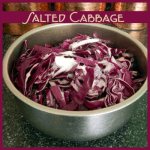
- Once the cabbage is finely cut up, place it in a bowl with the salt and massage it with clean hands. A potato masher is optional but makes the process easier. Work the cabbage until liquid starts to come out and the salt is well rubbed in. It will also start to get sort of limp. The liquid is going to be the brine so make sure and save all of it.
- Pack the cabbage tightly into your container, making sure there’s some room toward the top. If you have too much you could make two smaller batches or look around for a bigger vessel. Glass or food safe plastic is preferred, my dad used to make big batches in a food safe five gallon bucket we had gotten from a local restaurant.
- Once you have all your cabbage in the container, tamp and pack it down. I find the back end of my potato masher works nicely for this but you could use your hands, the end of a bottle, or something else. If the liquid from the cabbage comes up over the top, great. If not, top it up with a little water. You want the cabbage to always stay below the surface of the water. That, plus the salt, protects it from rotting while it ferments.
- Finally, weight down the cabbage with your bag of weights, lid, jar of water, or other item. Some people use a cabbage leaf to line the top of the jar before putting their weight on.
- Cover the whole thing with a kitchen towel, cheese cloth, loose plastic bag, etc., to ward off bugs but at the same time let gases escape.
- Let the container sit in a warm place (between 60 and 75 degrees F) for about three days. If you see bubbles, that’s a good sign. Taste the cabbage after the first three days to see if it’s sour. The longer you leave it, the more sour it gets. Once it hits your desired level of sourness, you can put it in the fridge or a cooler room to slow the fermentation. Kraut made this way can last for months in the fridge!

Tips
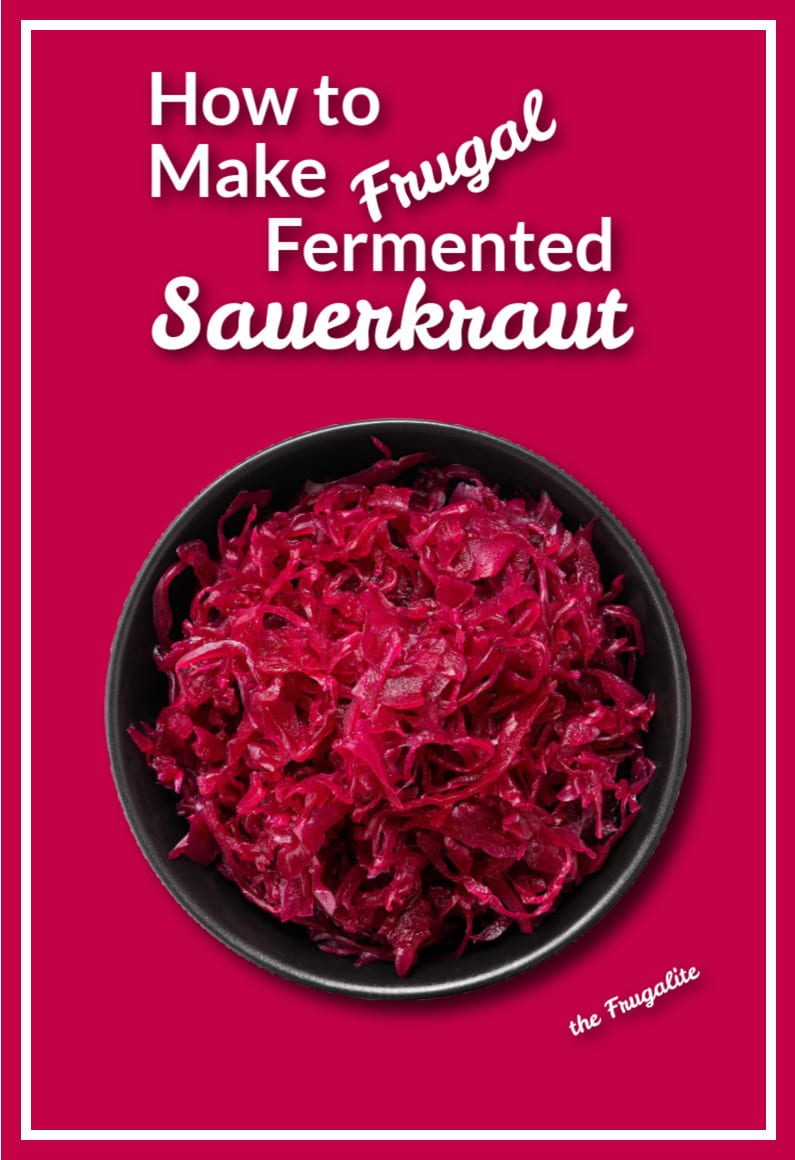
Types of cabbage to use: Really any kind of cabbage, be it green, red, or something else. You can use Napa cabbage too. I like red cabbage, it makes a pretty purple kraut.
Regarding Salt: The reason why kosher salt is preferred is because it doesn’t have the flow agents that table salt does. Those can cause cloudiness in your brine. Some say iodine affects the flavor but a double blind taste test indicates the difference is pretty negligible. So if you don’t have kosher salt or fancy sea salt, you can still do this recipe.
Regarding water: Generally speaking, the less chlorine in your brine, the better. You can leave a container of tap water out overnight to let some of it evaporate, which can help.
Ideas for containers: Plastic ice cream buckets, big cottage cheese or yogurt containers, those plastic barrels snacks come in, big mayo jars (well scrubbed), pickle jars, or old protein powder jars if you have a friend who’s a weight lifter. Don’t use anything metal or that’s not food grade.
What to expect: After a day or two you will likely start to see or hear small bubbles. It may even get a bit foamy. If you get anything that’s an odd color or smells rotten, remove anything like that and make sure your cabbage is still fully covered. That’s not very common though. Your kraut will continue to get more sour until all sugars are consumed, but you can slow down the process at any time when you get a taste you like. It will become less salty tasting as time goes on.
What is happening: Basically, the beneficial bacteria that are naturally on the cabbage start to turn the sugars into lactic acid. That makes the sour flavor and preserves the cabbage from rotting. It’s an anaerobic process which is why we protect the cabbage from being exposed to air. This is the same type of process that is used for fermented pickles. Since this is a different type of fermentation than is used for making beer of wines, no alcohol is produced, only lactic acid.
Things to Try: You can also add flavorings to sauerkraut, such as caraway seed, garlic or hot peppers. Add these to the jar when first packing the cabbage.
I hope you enjoy your frugal, fermented sauerkraut!
About Rohvannyn
Rohvannyn Shaw lives in suburbia but still values old fashioned skills and techniques. When she’s not preventing her sourdough starter from taking over the world, she’s baking, grilling, reading, writing, illustrating stories, gaming, or keeping up with her cats. She maintains a website dedicated to creativity at http://mind-flight.org, as well as an art portfolio at http://rohvannynshaw.com.


4 thoughts on “How to Make Frugal Fermented Sauerkraut”
Ideally shouldn’t this be done in glass or a non reactive vessel? Great easy instructions but I have some concern about using plastic containers.
Ideally, yes, glass is best. However food grade plastic has been used successfully.
Old timers advise to carefully trim away every part of the *cabbage core*, as the core (enzymes) could potentially hinder the fermenting process and lead to spoilage. When choosing cabbages, the best are *medium density*— neither too lightweight and spongy nor those that are very dense and solid.
Great advice – thanks for the additional info! I mentioned removing the core but it’s useful to know why.