

(Psst: The FTC wants me to remind you that this website contains affiliate links. That means if you make a purchase from a link you click on, I might receive a small commission. This does not increase the price you’ll pay for that item nor does it decrease the awesomeness of the item. ~ Daisy)
By the author of the FREE online course Growing Self-Sufficiency: The Whole Picture
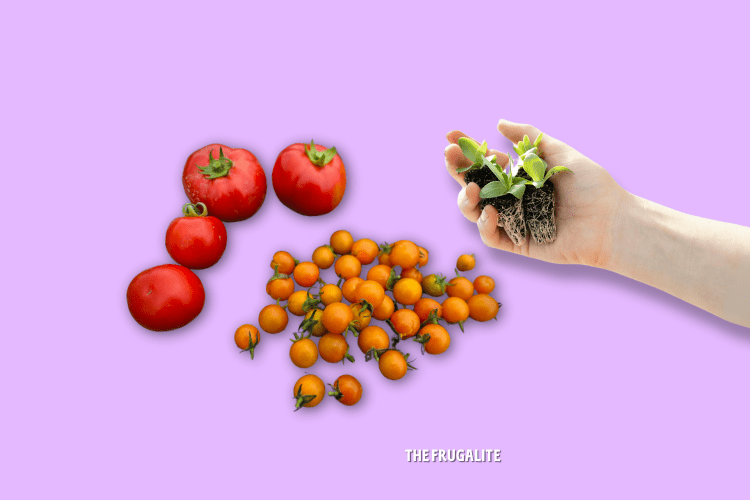
One of the most important ways I save money is by growing a lot of my own food. Over the years, I have gotten better and better at seed starting and saving money on my garden by developing certain habits. As I turn my head to the afternoon sun streaming in my glass door, I can see a half dozen contented cabbage seedlings and a dozen or more pepper seedlings basking in the sun.
Was I an overnight success at this? Heck no! Over a decade ago, I lost most of my first crop of seedlings by overwatering them. I hope this article will encourage you to give it a try…realizing that this is a skill set you learn over time. I am going to share my best thrifty tips on how I get an early start on my garden without spending an arm and a leg. And honestly, who would ever want to spend an arm and a leg for anything?
Starting What I Can at Home
I am quite sure that the price of seedlings, like everything else, will be higher than you would believe this spring. Even in previous years where I was not experiencing sticker shock at the grocery store about the cost of a pound of butter, buying a bunch of seedlings did add up.
If you’re like me and don’t have money to drop on expensive plants, why not start a few at home? This year, I’ve pared back on the variety to cut seed costs, but I’m still growing cabbage, kale, kohlrabi, hot peppers, green peppers, and three types of tomatoes! As I prefer to eat plants grown without chemical fertilizers and pesticides, seedlings like that sell for a premium price and may not even be available locally. So, I am saving on my seedlings, as well as an expensive drive to the big city.
Planting Last Year’s Seeds
OK, maybe I’m more relaxed about this than other gardeners…or perhaps more thrifty??? I have great success with seeds that are not from the current year. I do have a few ideas for how to plant these in a thrifty way, too. For older seeds, I don’t count on 100% germination. So, I plant two at a time in one space, and I plant extra spaces. This way, even with a 50% germination rate, I should have a plant in every space. And if some of the seedlings aren’t as healthy or strong, I will still have my planned number for my garden, plus some to donate to the local community gardens.
Some of you might want some numbers: This year, 1 year old Hungarian Hot Wax Pepper seeds had a 100% germination rate. My 1 year old green pepper seeds were somewhat lower, with closer to 50% germination and one stunted seedling that wasn’t viable. Will I make my pepper quota this way? You betcha! I only plan on planting 2 – 3 in my own garden, so I still have 2 or 3 to give away.
Reusing What I Can
I like to start seeds in small black plastic flats that come with clear plastic domes. These are quite inexpensive at the local discount store, but I still reuse them from year to year. To make them suitable for my uses, I actually drill holes in the bottom of them for drainage. I sit them in a similarly sized aluminum roasting pan. This prevents leaking and also allows me to water from the bottom if I prefer. Kept out of the direct sunlight outside, which warps them, these trays will last for years.
My little “grow op,” as I fondly call it, also has some grow lights. These are reusable from year to year and cost virtually nothing for electricity. I have desk lamps with adjustable necks that allow me to move the light as close to the seedlings as I need to. Our local hardware store sells grow bulbs that fit in a standard light bulb socket for less than $5! Each year, I try to add one or more lights to the setup. Over several years, I have collected more than enough for a minimal output of cash.
Newspaper Pots Save the Day (and some cash!)
I used to fuss with a whole bunch of plastic pots, six-packs, and trays of varying sizes for transplantation. These took up tons of space in my shed, and when I gave plants away to various causes, I would not always get my pots back, leading to my needing to lurk at the end of people’s driveways, picking through their recycling for more pots. Now, I make my own pots out of newspaper by rolling a double sheet around a pint jar. Extra length is folded down to make a stronger bottom. I might not need to tape them if I was better at it, but I always do. It helps them stay more upright in my aluminum roasting pan before I fill them.
Another benefit of these newspaper pots is that they have good depth for root growth. Many of you have likely had the experience of pulling out a plant from a standard nursery six-pack to find a root-bound mess.
If you would like to see pictures of my flats and newspaper pots, check out my website here. If the article about my spring garden isn’t already up, you can subscribe down at the bottom of the page to make sure you receive it.
Seed Saving and Swapin’ with Friends
I am fortunate that I have friends who also love gardening. As spring approaches, we are often seen giving seeds to each other. “Hey, here’s an extra packet of pea seeds I found. Would you like it?” or “Hey, I know you like Calendula…these are kind of old, but you could still throw them in the garden.”
Just this week, I brought over a bunch of my Russian Mammoth sunflower seeds that I saved from last year to my good friend. He’s bound to bring me some marigold seeds like he usually does.
I have had very good success with saving tomato seeds. I have a wonderful heirloom beefsteak that is now in its third or fourth generation. People rave about how “beefy” it is! I have had zero success with saving any kind of pepper seeds. Well, actually, I have 100% success with saving them and 0% success with germination. Why do I keep trying? Because I value skill development, and it will be good to know what I can and can’t save should there ever be a seed apocalypse (and I hope there won’t be!).
Patience is a Virtue (and a money saver!)
After all of the effort to grow, nurture, transplant, and harden off my own seedlings, I still like a good deal when the garden centres are having their clearance sales! Why is that? Well, I can fill in any holes in my garden with some inexpensive extras. As well, sometimes I suffer early losses for various reasons.
By the time these places are holding their sales, I will generally know what has done well and what has not. At one hardware store in a nearby city, the young man working for the garden center did not have the heart to throw the remaining garden plants in the dumpster, as he was directed to by his boss. The result? A multi-day pick-up spree where I got countless plants for FREE and called all my friends to tell them about plants they could get. You never know! It’s always worth keeping an eye out!
If you still feel like you need some tips on seed starting mix and how to start seedlings, you can also check out this great article here.
Planting the Seeds of Savings
There are many ways to reduce the cost of a home garden. Could you see yourself trying any of the thrifty garden tips offered here? Do you have one you can share with us? Please tell us in the comments below.
About Colette
Colette is passionate about sharing her knowledge of thrifty living and self-sufficiency. She has developed her skills in self-reliance living in the suburbs, the city, and more recently, on her own Half-Acre Homestead. Colette lived five years completely off-grid and without running water in an eight by 24 foot tiny home while designing and building her own 18 by 24-foot eco-cabin. Her website, Half Acre Homestead is attracting followers from around the world who want to become more self-sufficient. Colette invites you to stop by the Homestead and check out all of the great resources including the practical How To Guides, A Tiny Home Resource Center and her organic gardening stories on her blog. She shares her wholistic model (body/mind/spirit) for achieving self-sufficiency in her Free Course, “Growing Self-Sufficiency: The Whole Picture.” Stop by the Homestead today to register free of charge!


7 thoughts on “Thrifty Tips for Early Garden Starts”
I keep seeds in a tight jar in the refrigerator and have had good germination as long as 5 years after date of purchase. I start seeds in toilet paper tubes with a layer of newspaper wrapped around each. I put them in a few plastic takeout trays for easy watering. The takeout trays have been around a long time since I very seldom get takeout food! The tubes are long enough to allow for development of long roots. My started plants go into pots on my deck or small front porch—herbs on the porch and vegetables on the deck. I’ve had surprisingly good results with zucchini and cucumber harvests. Peppers haven’t done quite as well but enough to make it worthwhile.
Hi Mary, Thanks so much for sharing your own thrifty system for starting seeds and transitioning outside! I am heartily encourage by your 5 year time frame for the seeds! Your toilet paper tubes would be around the same height as my newspaper tubes…..I appreciate the extra height these allow for root development, too. I think many Frugalites who have only a deck or a small porch will be encouraged by your comment. Much appreciated! Wishing you a “fruitful” growing season this year!
I recycle yogurt cups & various plastic containers as plant start pots. I use those mainly for seedlings I will be trading or gifting. I have several enameled trays & aluminum roasting pans that hold my seedlings & allow me to bottom water 1 or 2 times a week or as needed in dry & hot weather.
When looking for seedlings, don’t forget local farmer’s markets & family run feedstores. I find the seedlings, berry bushes & fruit trees to be much healthier & less expensive than the big box stores. Plus they are usually heirloom varieties, so I can seed save or root cuttings for another crop.
Hi Angelcrest, The yoghurt cups and plastic containers are a fantastic idea for those you will be trading and/or gifting! I’m sure a simple call to family and friends could get someone a collection of these if they don’t already have some. A tip I didn’t include in the article was my habit of trolling along the roadside of local villages with recycle pick up. One day, I was able to get dozens of plastic tubs for planting, along with matching trays….all for free from someone’s recycle! I love your reminder about the local run feedstores and markets. I was just at our local feedstore yesterday, as I happened to be driving by. I was delighted to see that they were selling great seeds…..by the ounce!!!! I was able to buy a small amount of a couple of ones I didn’t have for only a few dollars. I gave a few to a gardening friend over coffee today, will plant a few today in my own garden and will donate the rest to our local community garden. One day, I hope to plant some fruit trees here, and appreciate your tip on where to buy. Wishing you a wonderful growing season!
Paper egg cartons are pretty good and red Solo cups (or equivalent) are pretty handy for starting seeds, big and little. A somewhat flimsy but quite reusable option for large drip trays is aluminum foil baking dishes such as cake pans and such.
I’ve started saving seeds from heirloom vegetables I buy and all my potatoes are regrown from small store taters – usually the organic ones but not always. Many of the ones I buy have apparently no growth retardant sprayed on them at all, in particular my beloved Yukon Golds, which even when I buy non organic ones love to sprout in just a few weeks and make big, healthy plants. $1.99 or less for seed potatoes? Yes, please!
I buy all my purple potatoes from my natural foods store and they grow really well. All my green onions are regrown from grocery store. My best pepper plants were originally from some lovely Thai chilis that had been languishing (and drying) in the fridge for a year.
Hi Redbranch, Ha ha ha! I love your story about those Thai chilis in your fridge! What a great experience to share, as many reading would have likely tossed them, and now know the seeds could actually grow something! Similarly, I had read about the growth retardant spray and had not tried growing any spuds from store bought. These are particularly useful experiences to share for that reason. I just last week had the chance to try purple potatoes for the first time. They sure are beautiful and tasty! We are short in this area in the potato variety I generally like to grow, which is Irish Cobbler. I will keep an eye out for some good Yukon Golds. Much appreciated!
I use toilet paper tubes, cut to half length, as seed starters in those aluminum pans. The pans have plastic lids so they keep in the moisture. Use two pans, poke holes in the bottom of one for drainage, and use another, preferably larger one, to fill with water. You can plant the tubes without disturbing roots, and they will break down. They are deeper than an egg carton, so you can get more root development.