(Psst: The FTC wants me to remind you that this website contains affiliate links. That means if you make a purchase from a link you click on, I might receive a small commission. This does not increase the price you’ll pay for that item nor does it decrease the awesomeness of the item. ~ Daisy)
A new Dutch oven awaited under the tree this Christmas, and we’ve had the opportunity to put it to a bit of use of late. Colder weather means soup is on the table, and you can’t have soup without also having the bread to go with it. For those who need something to soak up the remnants of their potato soup after a long day shoveling snow, here is our super frugal Dutch oven bread that costs just over one dollar per loaf.
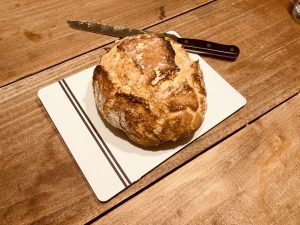
Ingredients
- Flour (3 cups)
- Salt (1.5 teaspoons)
- Yeast (2 teaspoons)
- Sugar (1 tablespoon)
- Butter (1 tablespoon)
- Water (1.5 cups)
How do you make super frugal Dutch oven bread?
I threw the flour, yeast, salt, sugar, and water into a bowl together and mixed it all up into a big, sticky glob of dough. Make sure you do this is a large bowl because that dough is going to rise pretty drastically in the near future.
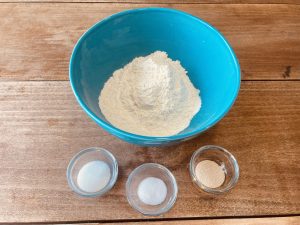
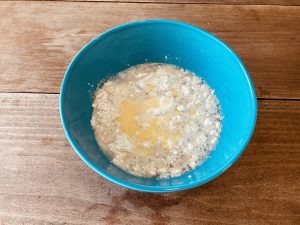
Cover the bowl with saran wrap, and then throw a towel over the top of it. Then leave it sitting for three hours as the yeast works its magic.
While you’re waiting for your dough to rise, put the Dutch oven into your oven and set it to 450 degrees.
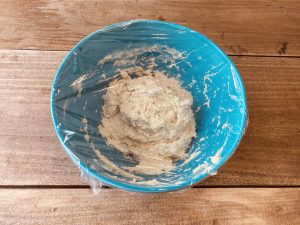
Once your oven is hot enough and your dough has risen, grab a big stretch of parchment paper and sprinkle it with flour. Scoop your air bubble of dough out of your bowl and place it on the parchment paper.
Form this dough into a big ball. You’re going to have to put a little flour on the outside of your dough ball to keep it sticking from your hands. (Sorry, no pictures. My hands were covered in goop.)
Now put on some oven mitts. You’re going to take your Dutch oven out of the oven. It’s going to be really hot. Pick up your parchment paper with the dough ball on top of it and nestle it inside your Dutch oven.
Then, cover the Dutch oven with the lid and stick it all back in the oven. You’re going to wait for 30 minutes. During this time, you’re going to read this book on how to save money in your kitchen.
After 30 minutes has passed, you’re going to take the lid off your Dutch oven and leave your bread baking for another 15 minutes, or until golden brown on top.
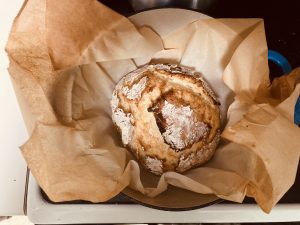
Once the time has passed, take your Dutch oven out of the oven, and dump your bread out onto something. Everything is going to be very hot, so be sure to be careful.
Wait a few minutes until your bread as cooled enough (we wait around 10 minutes), and then start carving off slices!
(I actually melted down some butter in the microwave with some parmesan cheese and then brushed it on top of this particular loaf during the cool down process.)
The cost of this Dutch oven bread? You’ll be surprised.
Well, maybe you won’t be surprised. After all, the cost was in the title, right?
Regardless, cooking from scratch is the best way I know to save money in the kitchen. To illustrate that point, check out the individual costs of each item in this recipe…
Flour
Three cups of flour weighs approximately one pound. Right now, I can buy a 5-pound bag of flour for $2.20. This means I spent $0.44 on flour for this recipe.
Sugar
One tablespoon of sugar weighs 0.03 pounds. I can pick up a 4-pound sack of sugar for $1.90 at the moment. This comes out to $0.48/pound, meaning I spent about a penny on my sugar for this recipe.
Yeast
Those little tear off single-serve packets of yeast can be bought in a three pack for right around $2.00. You’ll use just about the full contents of one of these little packets for this recipe, meaning your yeast cost here is $0.67.
Salt
I’m not even sure the salt is worth calculating here. You can pick up 26 oz of salt (737 grams) for all of $0.60. We used 9 grams of salt in this recipe. We’re talking barely spending a penny on salt here.
Butter
I used a tablespoon of butter. A stick of butter is 8 tablespoons. Butter is bought in 4-packs, which you can pick up for around $3.50. This means you get 32 tablespoons of butter. So I spent $0.11 on my butter for this recipe.
Total Cost
- Flour – $0.44
- Sugar – $0.01
- Yeast – $0.67
- Salt – $0.01
- Butter – $0.11
- TOTAL – $1.24
Keep your money in the bank and not in your belly.
All of $1.24 for this awesome loaf of bread. Tell me, are you going to be able to get anywhere close to that price if you bought an artisan-style loaf of bread at your local bakery? I can assure you the answer is no. The most similar type of bread in my grocery store is right around $4.00. This means I could easily bake several of these loaves for my family and still beat the price of one loaf at the grocery store.
And it’s delicious too! I can even get super-picky eaters to ask for this bread.
If you’re looking for a frugal means to help feed your family, baking and cooking from scratch is the way to do it. Hopefully, you’ll find that recipes such as this one can help you to do that.
What are your thoughts though? Did you try the recipe? Have you ever made Dutch oven bread? Do you regularly bake bread? Let us know in the comments below!
About Aden
Aden Tate is a regular contributor to TheOrganicPrepper.com and TheFrugalite.com. Aden runs a micro-farm where he raises dairy goats, a pig, honeybees, meat chickens, laying chickens, tomatoes, mushrooms, and greens. Aden has two published books, The Faithful Prepper and Zombie Choices. You can find his podcast The Last American on Preppers’ Broadcasting Network.







14 thoughts on “Frugal Dutch Oven Bread for Just Over a Dollar a Loaf”
Hello, just wondering if whole wheat flour could be used in this recipe.
Thank you
noralou@verizon.net
I have made this bread recipe many times with whole wheat flour. Some recipes say to use half white and half whole wheat. Either way works just fine.
Take salt packets from restaurants when you eat out and you won’t have to pay for salt. 🙂
Tried this today in my German brand Dutch oven (no enamel), the bread was amazing! Thanks Aden for the clear instructions..! Used t55 flour (French wheat) also next time I will use a just a bit less water (could be my bad due to small cups as we use grams in The Netherlands)
Even though I have a dutch oven, I haven’t used it for baking. However your recipe also looks ideal for the rising steam baking method I tried some years ago. I used a large steel pot with a big enough steamer insert to steam-bake ginger bread using fresh ground ginger from Whole Foods. That was before I acquired a grain mill to do that same flour production job in my kitchen. The effect was delicious as well as being portable. It could also make a good substitute for anyone not having a dutch oven.
–Lewis
If you have not watched Steve on you tube your missing out. He teaches you how to make bread all kinds of ways & how to do it with no kneading ,no proofing, no mixer , & no bread machine. He even show’s how to make what he calls a poor mans dutch oven
Some of us just cant work the dough as our hands just cant do it.
you tube artisan bread with Steve
Hope this helps
so, over half the cost of the bread was the yeast. if bread baking becomes a regular event, consider buying yeast in 4 oz jars or 1 lb bags. yeast keeps well beyond its best buy date in the frig and almost forever in the freezer. you can also use half the yeast and let it rise for a longer time period.
You are right. Sam’s club has a 2 pack of one pound bags of yeast for $4.98. I put 1/2 of one bag in a jar in the fridge and store the rest in the freezer. Lasts me about a year. I make all our bread and buns. (Except hot dog buns. I suck at hot dog buns!) I’ve had this bread – best I’ve ever tasted!
If you don’t have a Sam’s club or Costco membership maybe someone you know can pick it up for you.
This morning I clicked in on the Amazon link to the Made in China enameled dutch oven that our author referenced. When reading the Q&A and some of the reviews, I saw where some people suffered the enamel cracking after only a few uses while other reviewers described how to avoid that problem. Some reviewers also mentioned avoiding steel utensils as well to protect the enamel. My dutch oven is not enameled so if I had not read up on the enameled version I would never have learned of the special care that enameled dutch ovens need.
–Lewis
–Lewis
Liike like a very interesting recipe but nowhere does it refer to where you add the butter…unless that is what you referred to at the end…?
Those three packs of yeast are 99 cents at my local Kroger. Makes your yeast cost 33 cents. Or, if you buy it by the jar (4 ounces for $3.29), the equivalent costs about 7 cents. Even less if you buy by the brick/bag.
Aden, do you use “name brands” for everything on your list? You could save even more using store brands.
To make this a grid down recipe, I’d sure like to see a variation using coals instead of the oven-inside-the-oven.
I think I could guess – 1) preheating the dutch oven to 450 with coals on top and bottom, and 2) later in the baking process, moving coals from the bottom to the top for the last 15 min. to get the bread top browned.
Has anyone tried this?
I love the recipe and want to try it. I’ve read through it several times and I can’t find where and when to add the butter. Could you please clarify? In one of the photos it looks like you’ve added melted butter on top of the raw dough but there’s nothing in the instructions to verify this.
Thanks
cost of electricity, initial cost of dutch oven and cost of parchment?