

(Psst: The FTC wants me to remind you that this website contains affiliate links. That means if you make a purchase from a link you click on, I might receive a small commission. This does not increase the price you’ll pay for that item nor does it decrease the awesomeness of the item. ~ Daisy)
By the author of What School Should Have Taught You: 75 Skills You’ll Actually Use in Life
Let’s say you just moved into a new place, and you want to put new locks on all the doors. You don’t want to pay somebody else to do it either. You want to do it yourself.
How to change a lock: remove the old one.
Here are the steps I follow to remove the old lock.
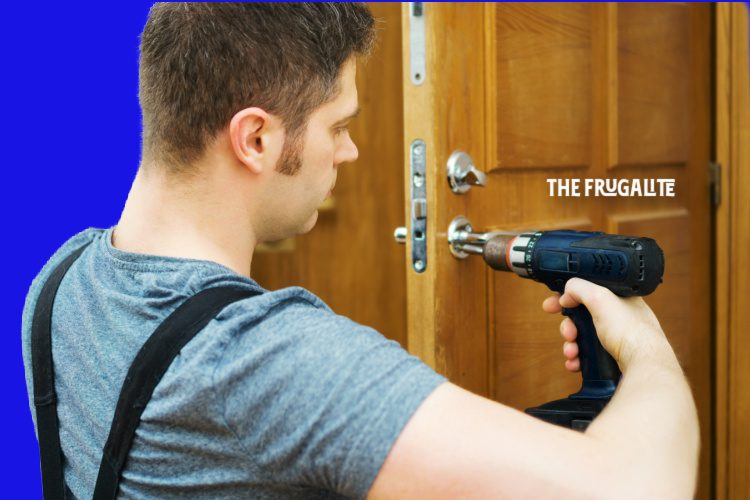
Step 1: Remove the deadbolt screws.
Start with the door open before you go to remove anything. I think it’s easiest to use one of my feet as a stop for the door while I work on the opposite side. To get the deadbolt screws, you can do this with either a Phillips head screwdriver or a drill. Either way. You’re likely going to have to move the deadbolt handle completely vertical before you can access both of the screws.
Keep one hand on the deadbolt on the opposite side of the door that you’re working on so that it doesn’t kerplunk onto the floor once you remove both of those screws.
Step 2: Pull out the two faces.
I just pull it apart. Nothing difficult here. What you’ll be left with is the bolt being stuck in the door. I would add to be careful with where you put the deadbolt parts. They can be kind of greasy sometimes.
Step 3: Remove the two screws for the actual bolt.
These will be on the skinny edge of the door. Once you have these two little screws out, you can just pull the bolt out of there.
Step 4: Remove the strike plate.
This is the little metal rectangle that the deadbolt slides into on your door frame. If you are replacing a brushed nickle deadbolt with another brushed nickle deadbolt, you may be able to leave the current strike plate there. If the old deadbolt strike plate is pretty nasty looking, take it off. You’re going to put a new one on in a few minutes anyway.
If you’re removing an actual doorknob, the process is pretty much exactly the same as above. Yeah, there can be some variation, but more or less, you’re just going to be doing the above four steps.
How to change a lock: install the new one.
Now, to put on a new lock, follow these steps.
Step 1: Start with the bolt.
You’re going to put this in first. There should be two tiny, pointy screws in your packaging. Those are what you’re going to use to drill the bolt into place. Don’t drill them into place too hard. You don’t want to bend the metal. Insert the bolt into the hole in the skinny edge of the door and then fasten it.
If the thing doesn’t fit because it appears to be too long, take the bolt out and twist it in your hands. Pretty much all of them can extend or shorten. Twisting them is the standard method of adjusting the length.
Step 2: Attach the deadbolt faces.
 First, you’re going to have to make sure that you thread the little metal stick through the little hole on the bolt you just installed in the door. This little metal stick is normally shaped like a letter ‘D,’ so find the correct orientation as you put it in there. You’re going to have to hold it in place with one hand as you take your other hand to get the thumb turn piece on now.
Again, you’re going to have to line up the ‘D’ shape with the thumb turn. You can do this by twisting the thumb turn to where it attaches.
When you’ve done this, use one hand to hold both of those face plates in place while you reach for your flat-tipped long screws that are likely just out of reach.
Put those screws through the two holes on the thumb-turn side of the deadbolt, and then use a screwdriver (NOT a drill) to screw them into place. Sometimes, it can be tricky to get the holes to line up, so you may have to fiddle with it a bit. The reason you don’t want to use a drill is so that you don’t overtighten anything.
Step 3: Make sure the strike plate works.
The deadbolt should turn pretty freely whenever you twist the thumb turn now. If it doesn’t, there’s a good chance that you may have over-tightened something. If there’s a moon shape gap in the hole where the lock when through, you probably made the bolt the wrong size.
If all is well, though, you’re going to make sure the bolt is retracted so that you don’t slam it into your door frame, and then gently shut the door. Lock and unlock the bolt a few times to make sure that it’s going in the hole that was previously drilled into the frame of the door.
Everything should be fine. If not, I typically try to peer through the gap in the door to see whether the bolt is striking too high, low, or to one of the sides. Then, I normally chisel out a little bit of whatever wood I need to get out of the way.
Step 4: Install the new strike plate.
Now, attach the new strike plate to the place where the old one used to be.
You’re going to want to drill it. If you’re going to be using longer screws for doing this, I always drill two pilot holes first to make sure I don’t strip out the head of the screw.
I also typically like to only install the top screw first, so that the strike plate is just kind of hanging there to make sure that the deadbolt is going into it correctly before I screw in the second one. You don’t have to do that, but it’s what I do.
If the deadbolt is going in and out of the strike plate without a hitch after all this, then congratulations, you did it. If it feels like it’s hard to turn, it’s likely rubbing against a side of the strike plate. When this happens, I shut the door, lock it, and then look through the crack to see if I can’t see where the deadbolt is rubbing.
Let’s say I see that it’s rubbing against the side of the strike plate nearest me. I then unlock the door, open it, and see if I can install the strike plate further in the direction it needs to be. That pretty much always does the job.
If it’s rubbing against the bottom of the strike plate, I like to check the hinges of the door to make sure that they’re all screwed in tight first. If so, then I move the strike plate lower.
And that’s my process for how I change a lock.
You can save a whole lot of money by learning to change locks yourself instead of calling out a locksmith.
What do you think? Have you had to change a lock before? Have you ever had issues with the strike plate? What did you do to fix it? Let us know in the comment section.
About Aden
Aden Tate is a regular contributor to TheOrganicPrepper.com and TheFrugalite.com. Aden runs a micro-farm where he raises dairy goats, a pig, honeybees, meat chickens, laying chickens, tomatoes, mushrooms, and greens. Aden has four published books, What School Should Have Taught You, The Faithful Prepper, An Arm and a Leg, The Prepper’s Guide to Post-Disaster Communications, and Zombie Choices. You can find his podcast The Last American on Preppers’ Broadcasting Network.


2 thoughts on “How to Change a Lock Yourself and Save Money”
A badly needed follow-on article to this one might be about why and how to strengthen (or replace) the door frame (and possibly the door as well) since it is not uncommon for criminals to simply kick through existing doors that are not designed to resist such force.
–Lewis
When you replace the two screws, don’t re-use what is there. Go to the hardware store and find 3″ wood screws with the same thread. It takes a LOT more force to go through the door due to the increased leverage. That was shown on an episode of Mythbusters back in 2007 or so.
Alas, there are other ways to get into your home. Some crooks use a circular saw to just cut their way in. That happened in my parents’ neighborhood, where a burglary gang cut a hole for themselves in several homes before being caught.